KBIS 2015
KBIS 2015 was an industry show event hosted in Las Vegas. Wilsonart was a participant and hired Sector 5 Digital to showcase their product line in Quartz and Laminates. The process was a a month job to produce ten Quartz and ten Laminate tabletop animations in CG. Click Here to watch video. Below are screen grab renders of video.


Process
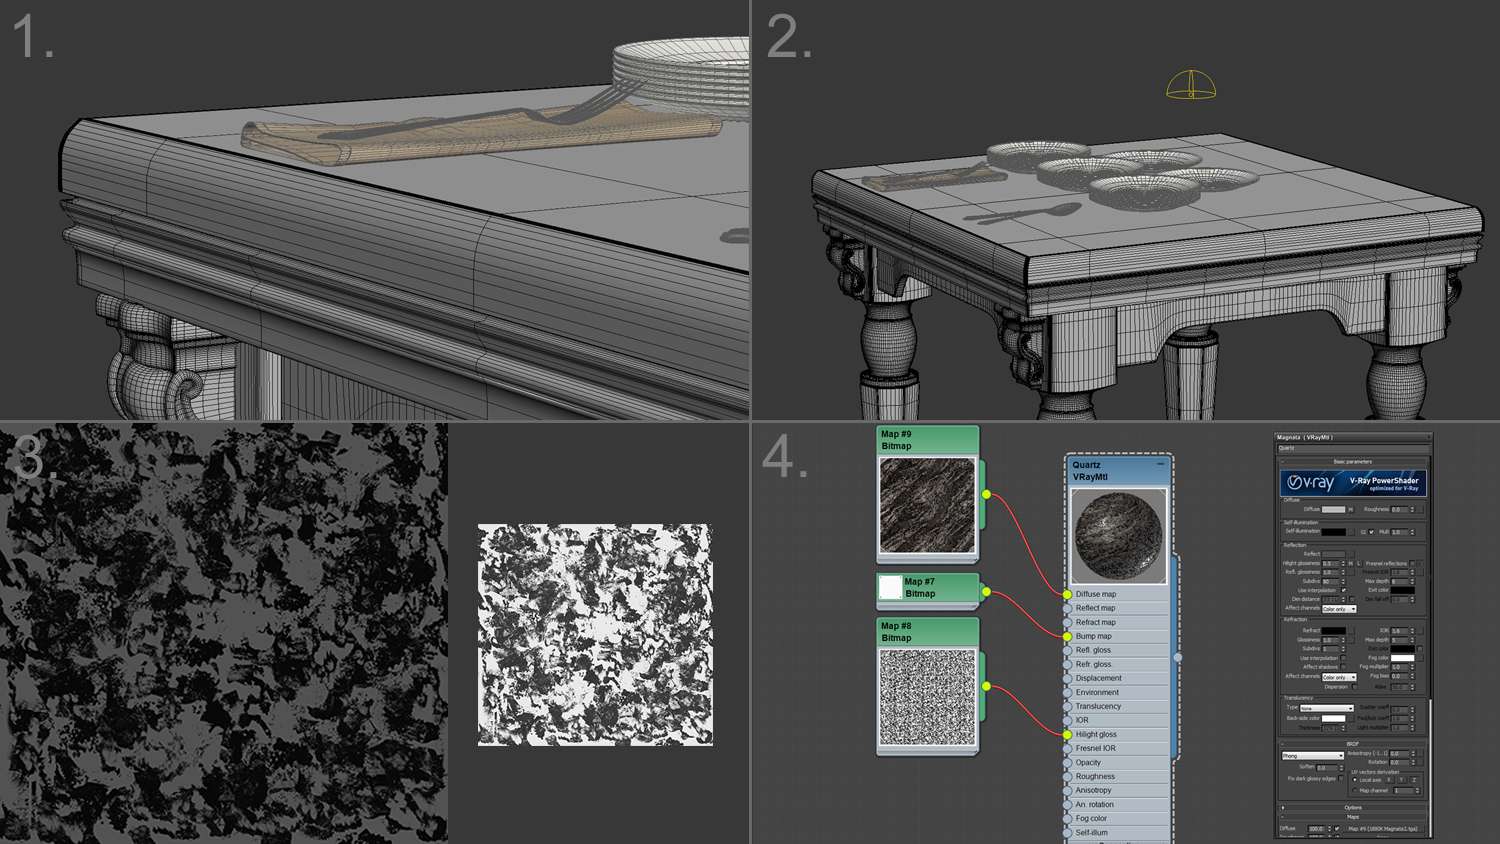
Much help in time was provided from evermotion archmodels, as there models helped in the adding of the composition. Once the first three surfaces were finished, it was a matter of using the same light and environments for the next job. Here is a short process.1. A combination of nice camera angles and beautiful table layout was required to make all surfaces as beautifully realistic.
2. The lighting process only required one light. The V-ray dome light with an HDRI attached to the texture slot was enough to illuminate beautiful rays of light through the solid surface.
3. Once the lighting was set, the next step was to texture. The colors for every surface was provided through scans, but the glossiness and bump values had to be created from scratch using Photoshop.
4. Back in 3ds max, all three maps have now been filled and now it was a matter of plugging in a reflection, bump, gloss and highlight map.