
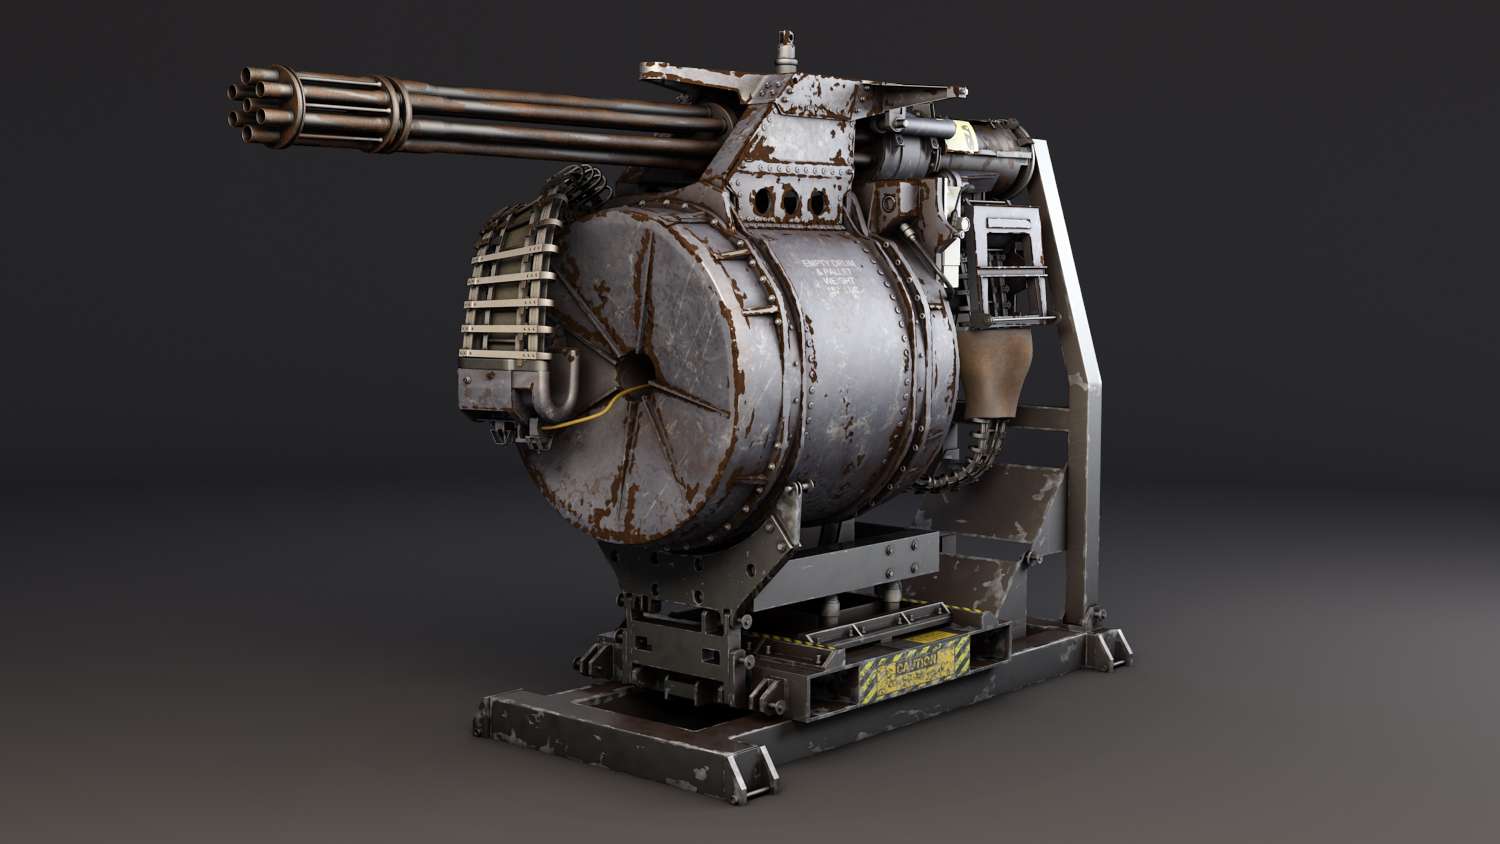


360 degree turnaround download: 360 degree turnaround
360 degree turnaround Grey shader download: 360 degree Grey turnaround
360 degree turnaround wireframe download: 360 degree Wire turnaround
PROCESS
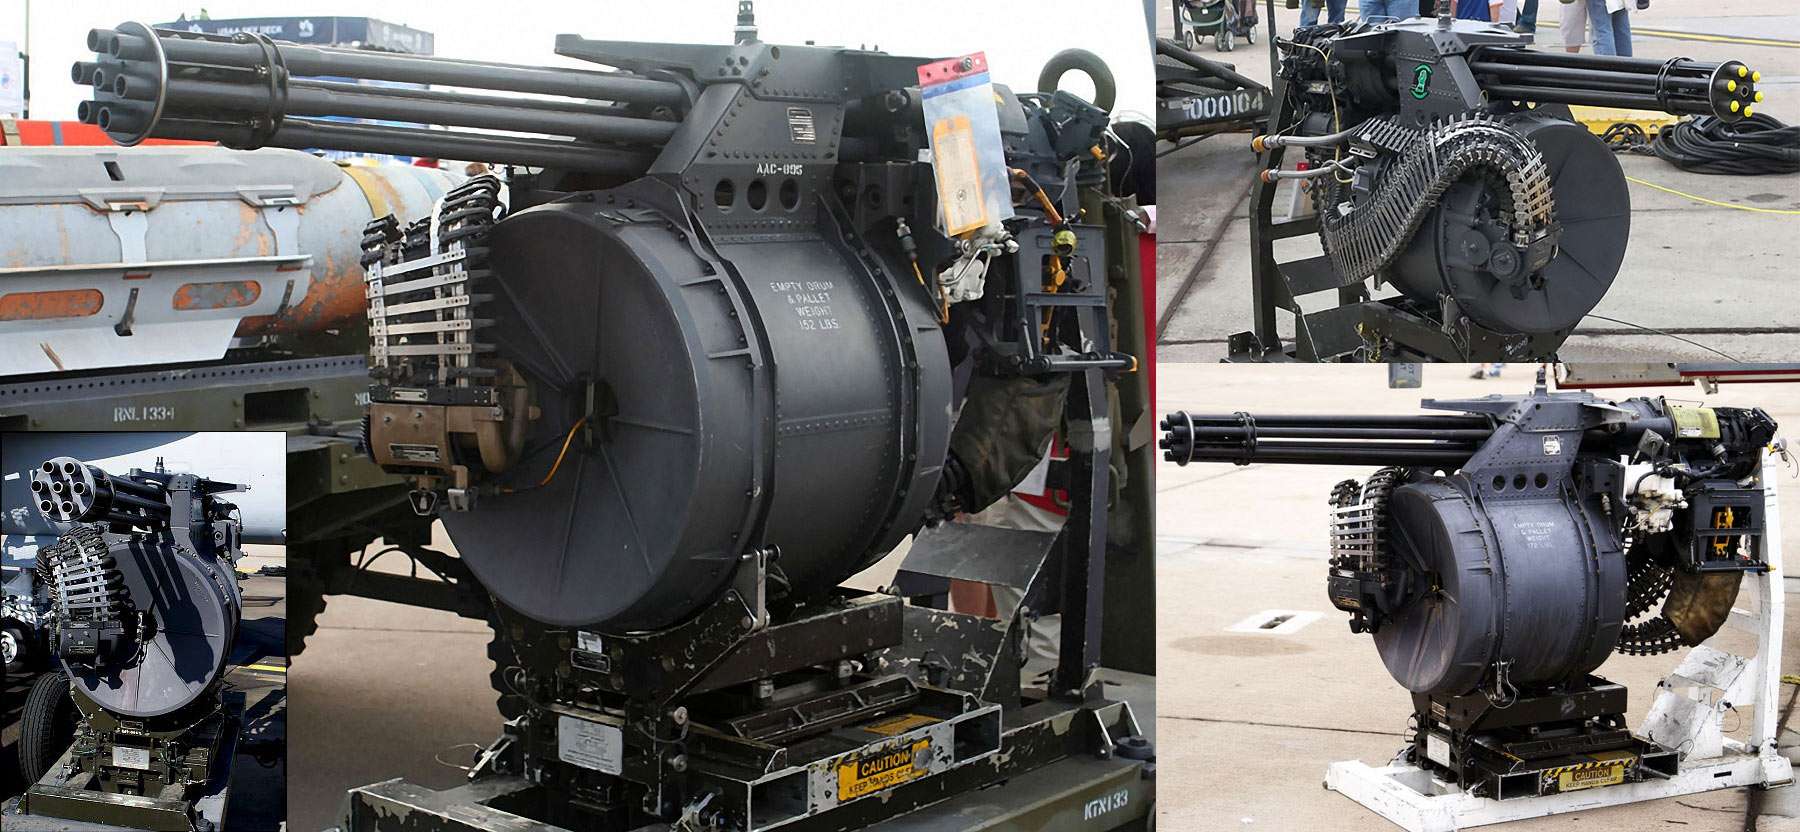
Gathering reference images was the first step in the building process. I didn't need just one, but I needed multiple views of every angle of the cannon. The better quality of the image, the better I will understand what I'm building. I also gathered video reference of the cannon to see how it worked and this was important also.
The blocking phase was straightforward. Using 3ds max, I started my block with simple shapes like squares, rectangles and cylinders to get the silhouette. To help with my size, I brought in image of the cannon and set it next to my block. After I was finished with the base overall shapes, I began detailing parts such as the drum and turret.

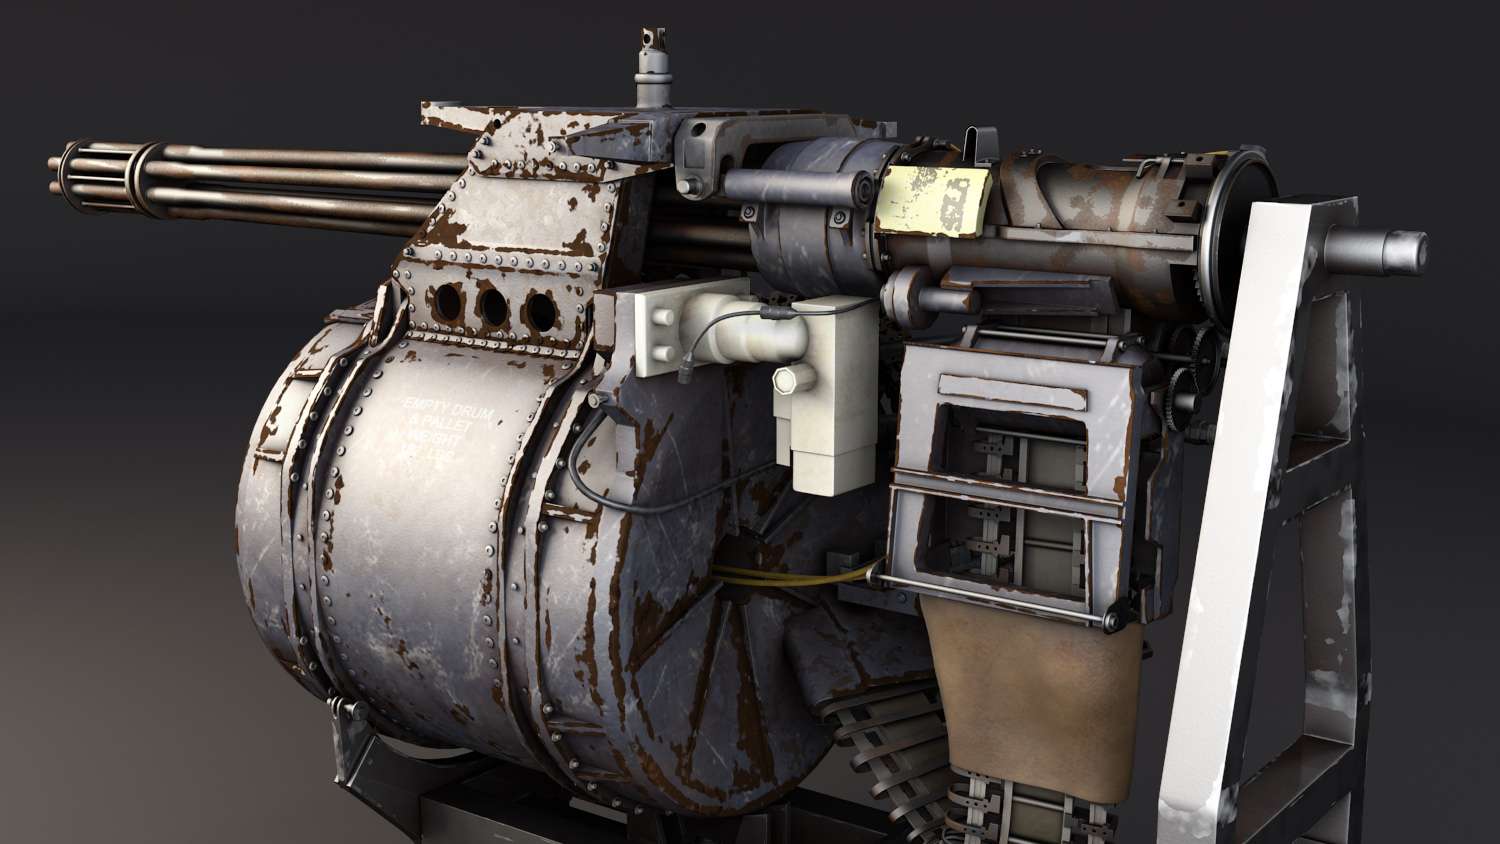
Building of back was a tough task, since it had so many little parts and pieces. From the all the images I gathered for this cannon, the parts that were hard to identify was the back, but thankfully I understood how each gear and box worked from the reference videos. From the beginning, I was building parts like the drum from one or two objects and this was a mistake, since it led me to have more geometry to build that what I wanted. In the end though, I was able to detach parts out, and make them as a separate object. This saved me time and space.
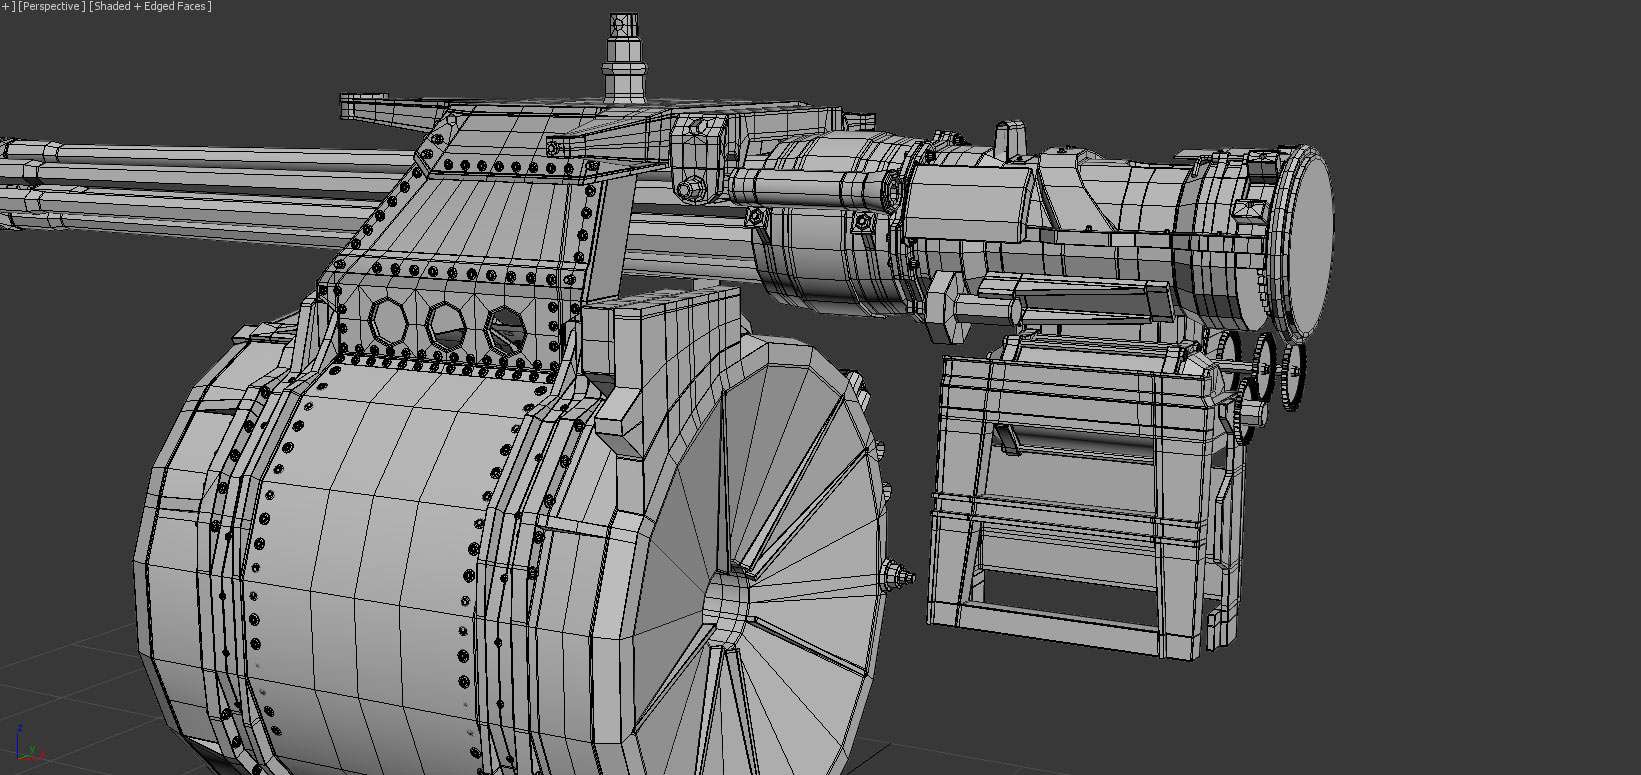
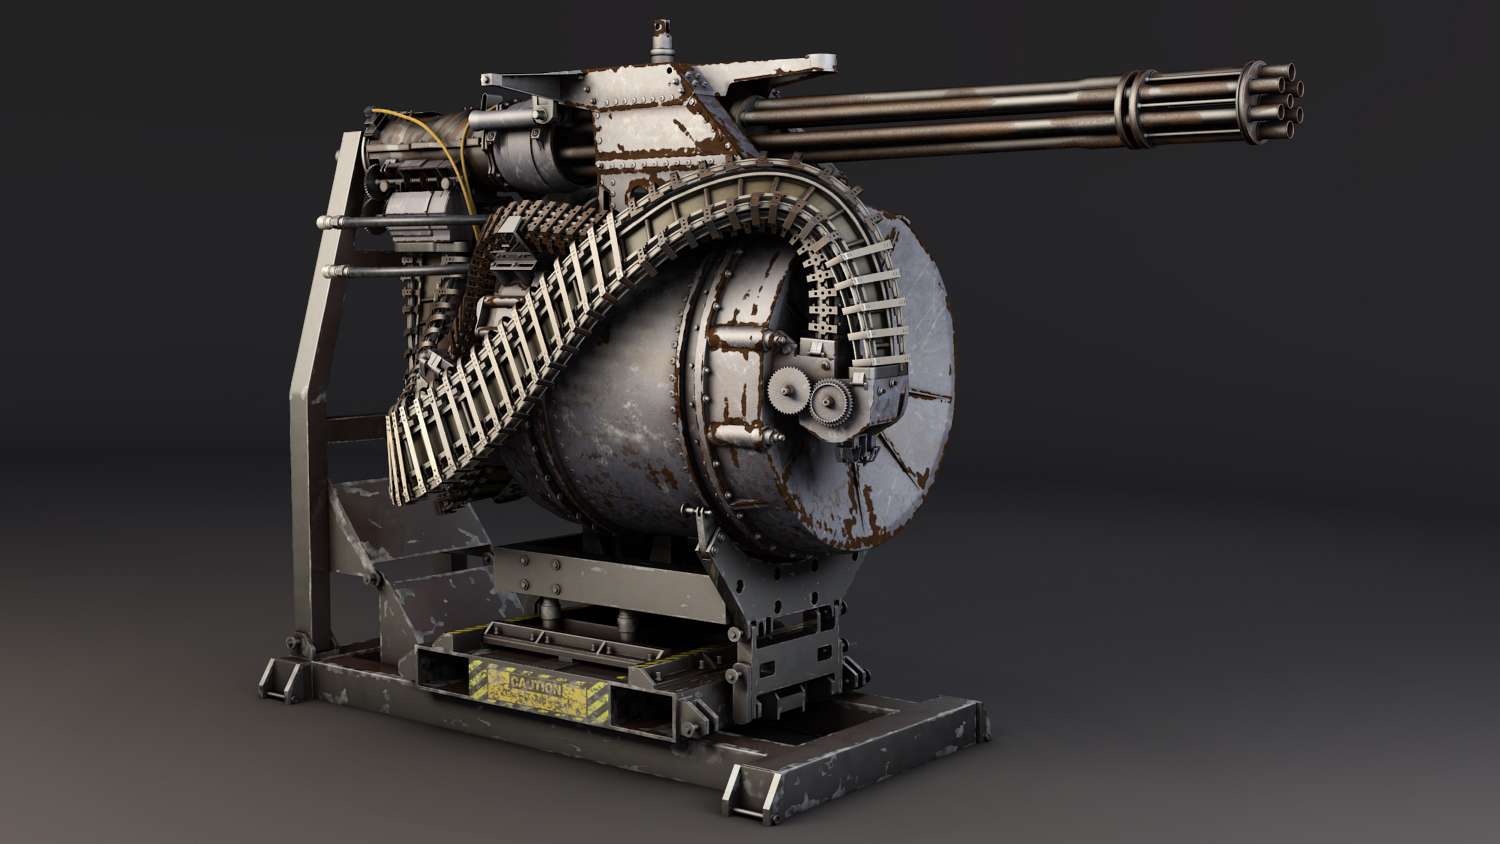
The problems that I would face early on was the ammo chain. I had to build two separate chains, one being a long one that wraps around the cannon and the other being a short one, which you see here. My concern would be on how I was going to make the chain wrap the way I want it too. It had a roller coaster type of wrap in which it turns at different angles from the front to back. To start, I build the first line of chain by building the base shape first and using instance to have an array of it. To make the bend, a spline path was set with world path deform modifier used as a tool to make the chain follow the spline.

Now that I was finished with my building, I moved on to texturing. While most people would think of unwrapping such model, I instead used to make my textures using 3ds max material slate editor. It is easy to use if you are familiar with node-based editors. The materials that I would be using would come from mental ray, but I also used standards like this and manipulated the attributes to look like the mental ray materials. Using different mixes of maps like smoke, cellular, noise and others, I was able to achieve a broken down surface for my cannon.
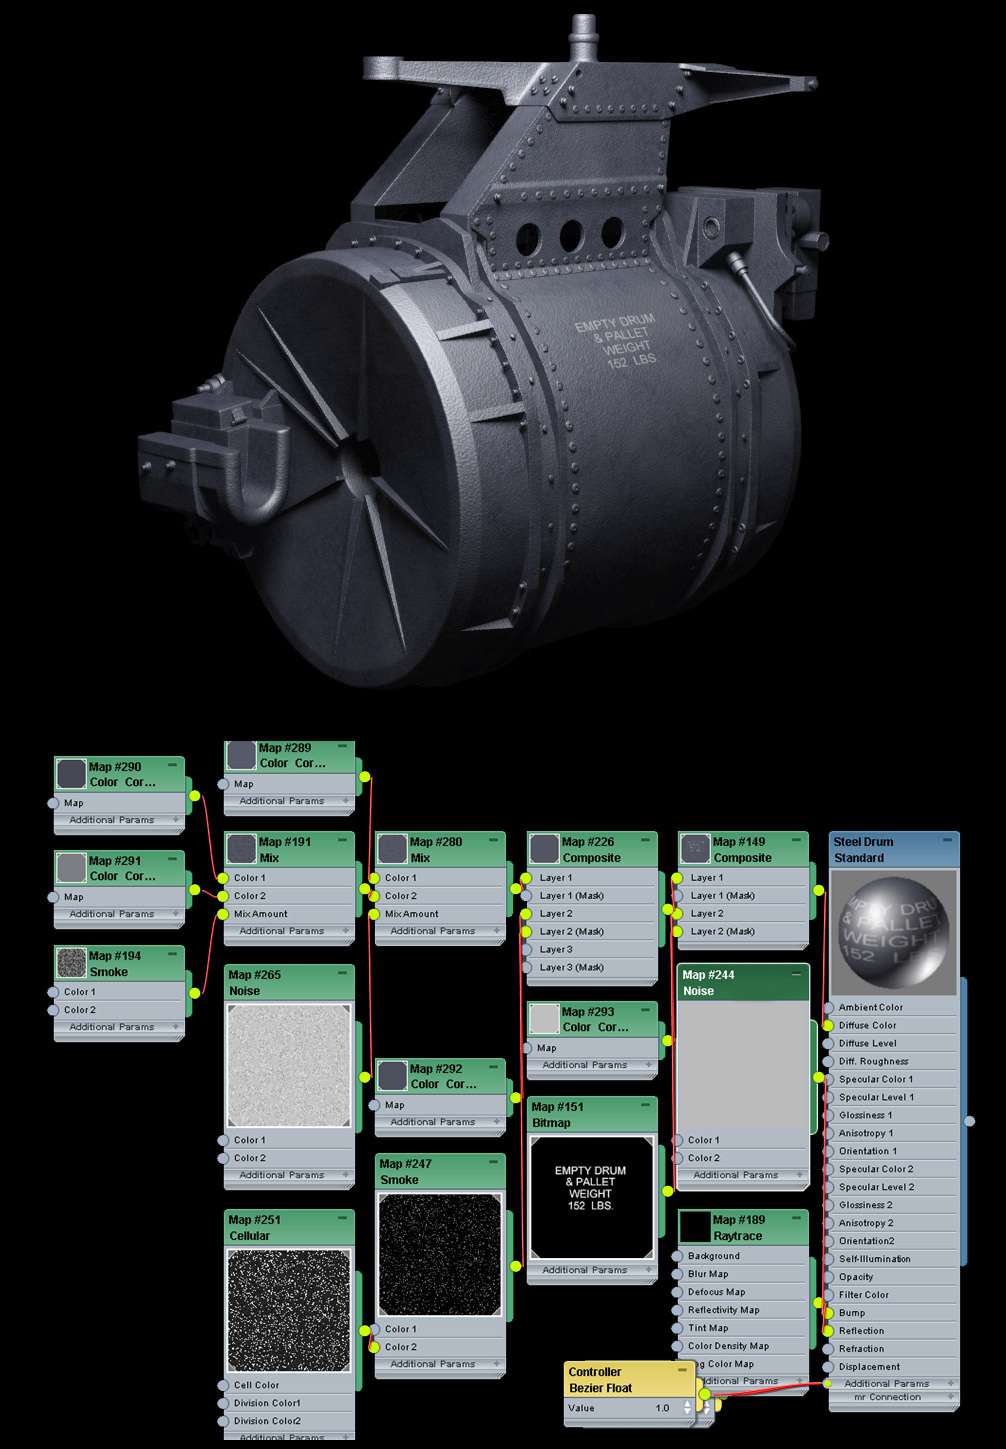
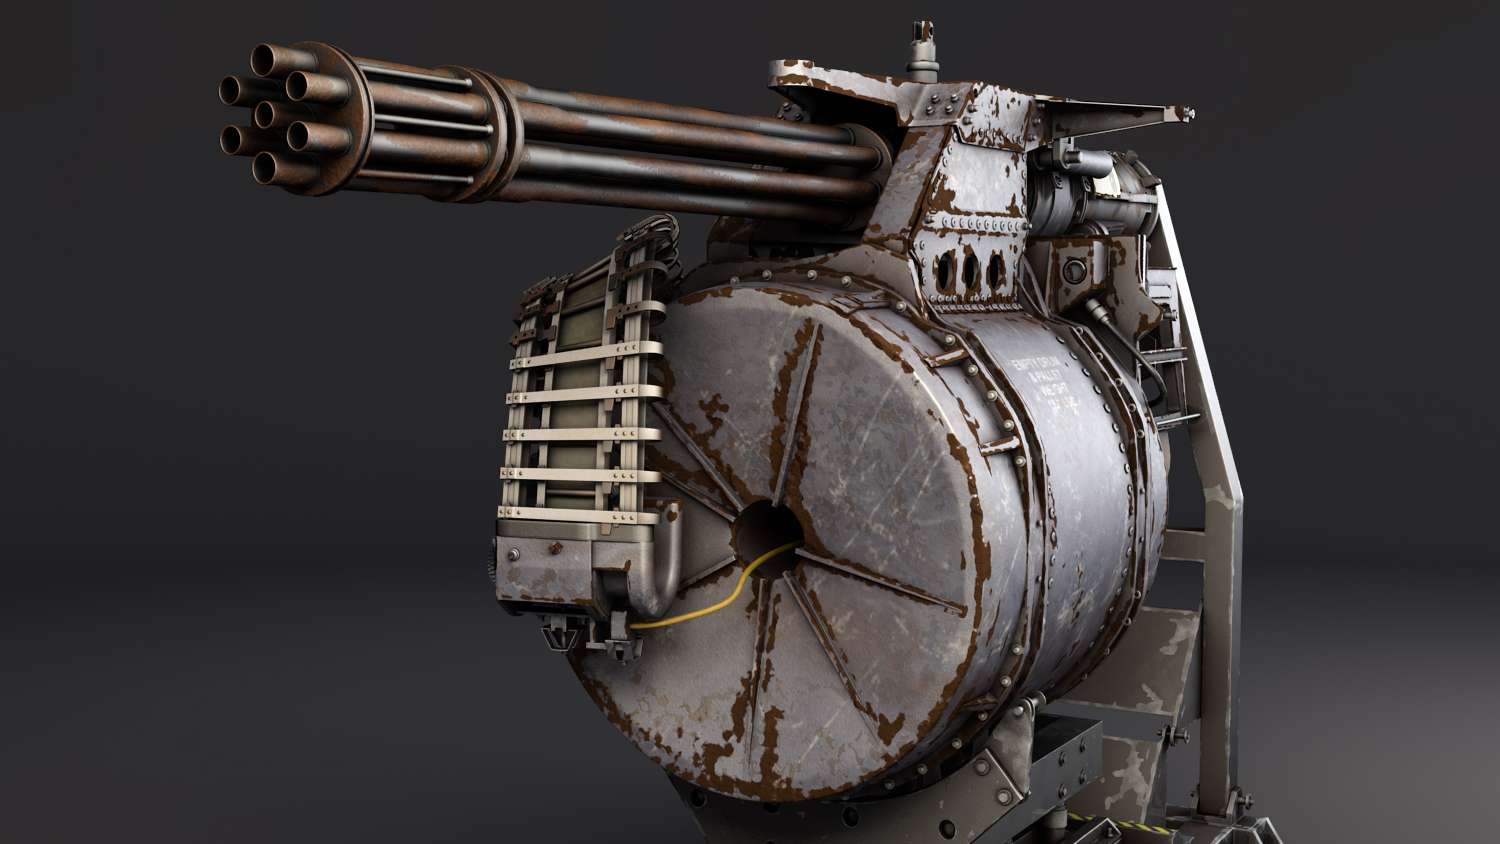
Using vertex paint modifier played a huge role in creating rust. How this works is by creating two different materials and using a blend node to composite both materials together. What makes the rust is by using one of the two materials as rust and using a vertex paint node as a mask to the blend node. Other factors that were used to create rust and pattern scrathes was using Neil Blevin's Box Map Maker. What this creates is a tileable bitmap all around an object. Neil Blevins explains it best and his info can be found Here.

Adding to the steel, I built a rust shader and used a modifier called vertex paint to paint this rust across my cannon. The way vertex paint worked is that it turns my cannon into an alpha in which black will be my rust, while white being my steel. The paint will also depend on the number of poly's you have on your cannon, since you will have more control over the surface. Next, I used a blend node to mix both steel and rust together and use a vertex paint node as the mask.

One last node-based map I used was Neil Blevins soulburn script. The blended box map maker was a very nice tool, because it let's you apply a tileable bitmap to an object as complicated as mine without the need for unwrapping. There is no stretching and it is applied as a modifier, which means you can turn on or off. I used this to make some scratch patterns around the drum. Once it is applied to your stack, it will appear in your material slate editor with the nodes placed.
Here is Neil Blevins download link: Download
