


Breakdown


PROCESS
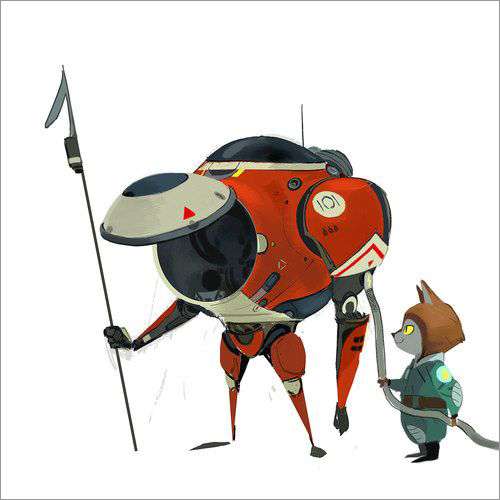
The approach is begun the same for all projects in which the concept is modeled with basic geometric shapes to get proportion sizing correct. My preferred modeling software is 3ds Max and for anything above that I will use Zbrush. Having the concept in the background will really help in getting the proportion size right. Once everything was aligned close, it was time for some detailing.
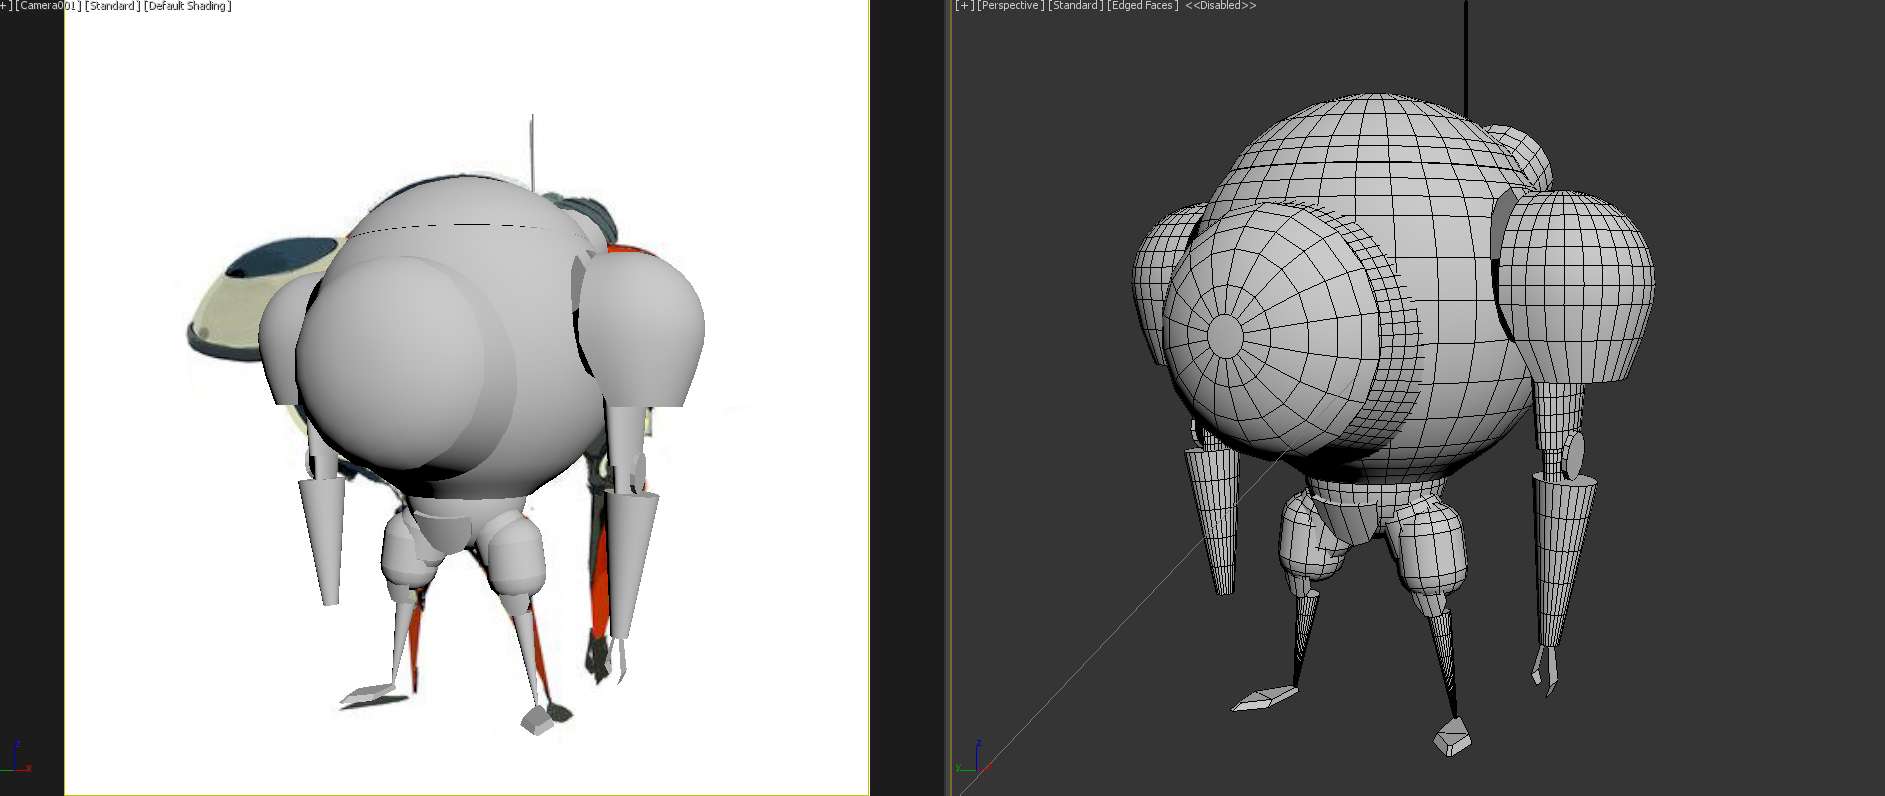
Since there weren't drawings for what the back would look like, improvisation was utilized. I tried not to stray off to far from the initial conceptual artist vision while adding a bit of my own. The hardest part was to hold on adding too much detail, since the concept was more cute/kid friendly.

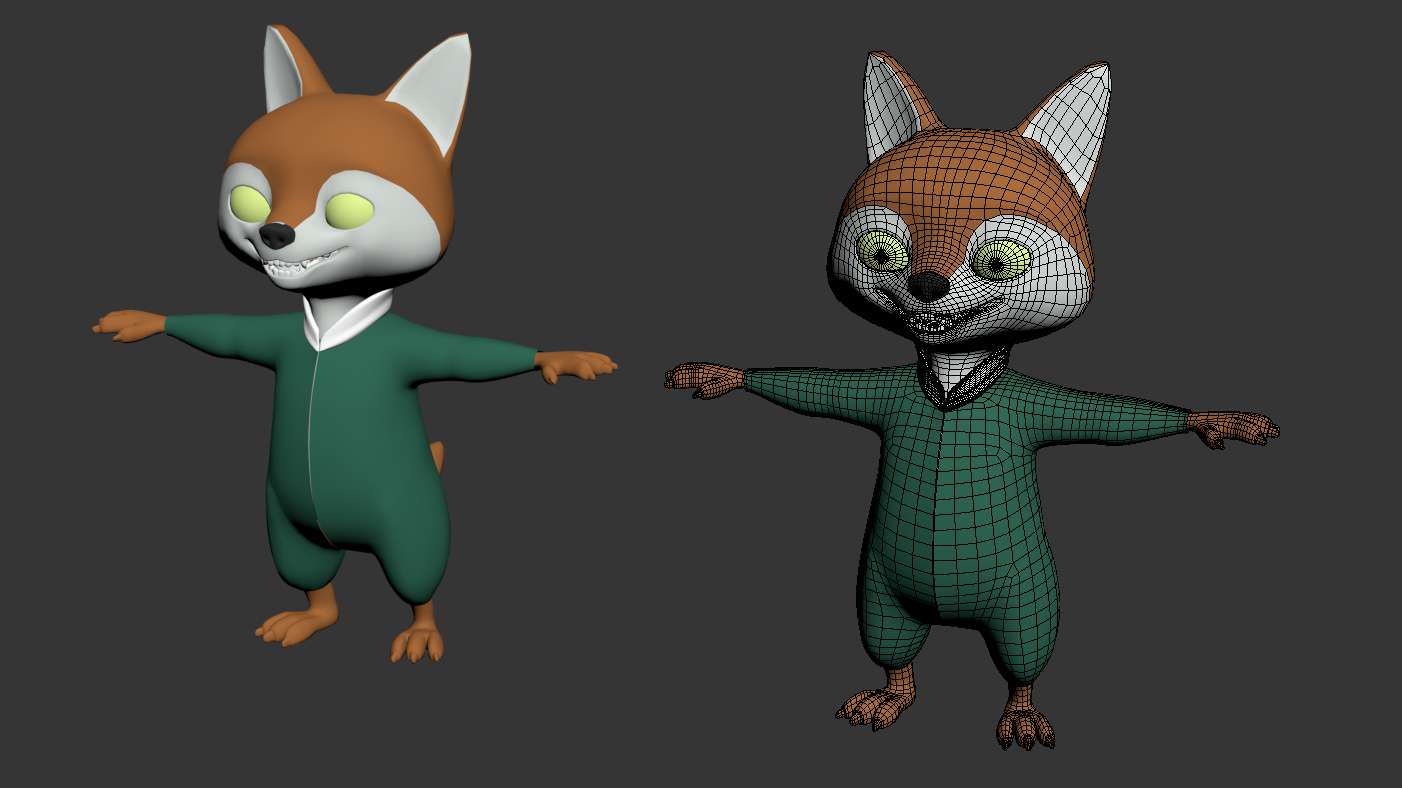
The fox character took a little more time to mold then the robot, since I was dealing with more organic shape. Extensive research was done, not only on Pixar related characters, but on real life animals that had the same feature as this Fox. One change was to make the Fox more lean and less round. This was for two reasons. One being that it will help me better in the Rigging process, as I could see where his joints would pivot. Another was to give the Fox more of a personalty in that I wanted him to look a little more of a strong/brave character and little less of a funny comic.
The final stage in the modeling process became to check for final proportions, and to also check for anything that may have been missed. Again, having the concept on the background was essential and I understood that it wouldn't match up line for line, since it was a drawing. Research was also taken into other drawings the concept artist had of similar characters that could help in sizes and any details.
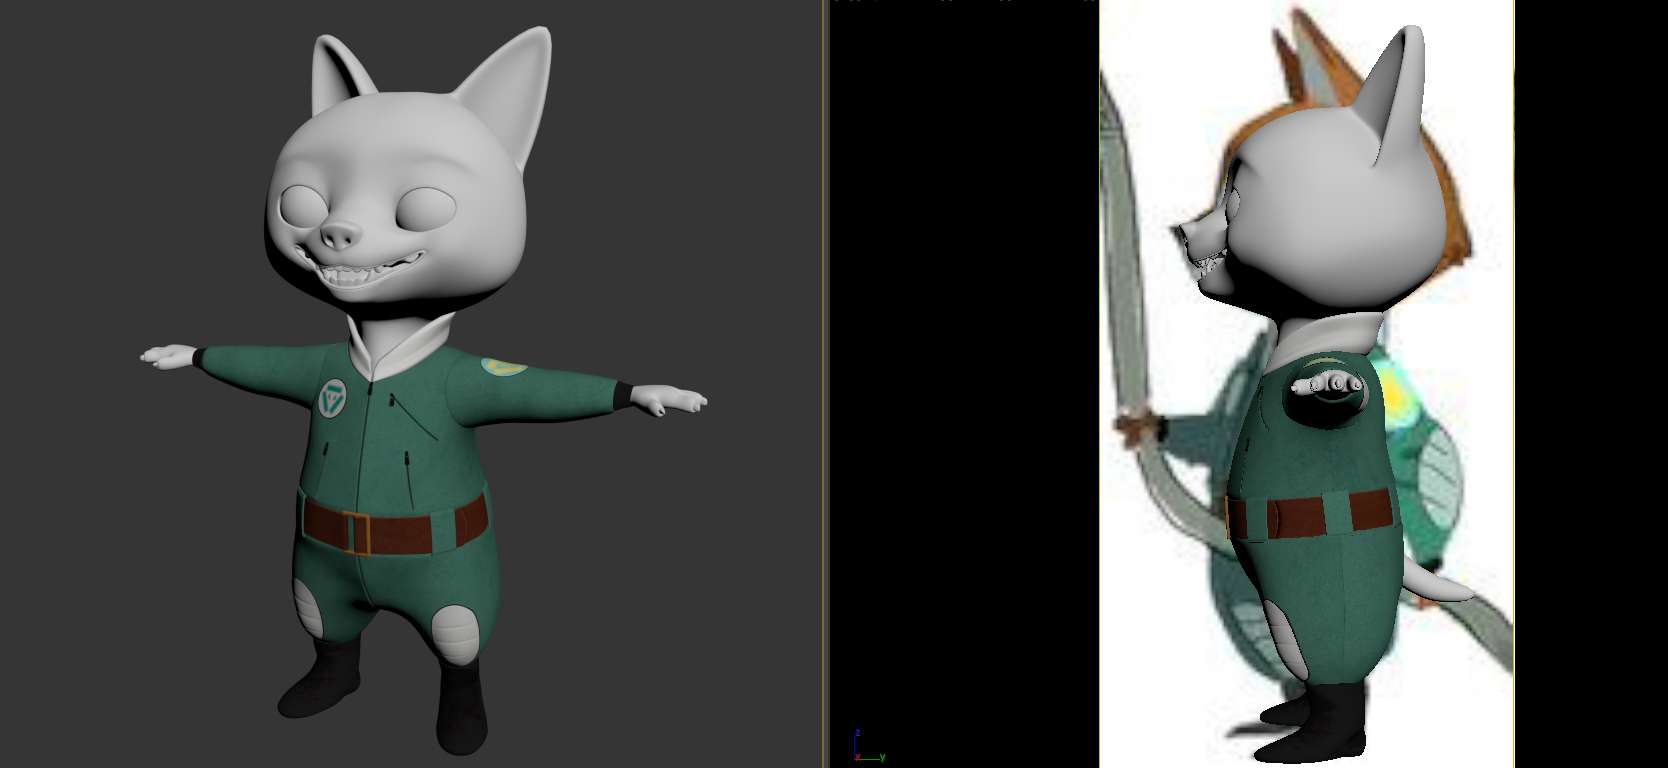
Once the modeling process was finished and models were clean, it was time to unwrap and take it into Photoshop, and other painting programs, for texturing. The robot character became easy enough to unwrap, and I had no issues for the Fox as well. Every bit of the characters became a texture from nails to eyes.
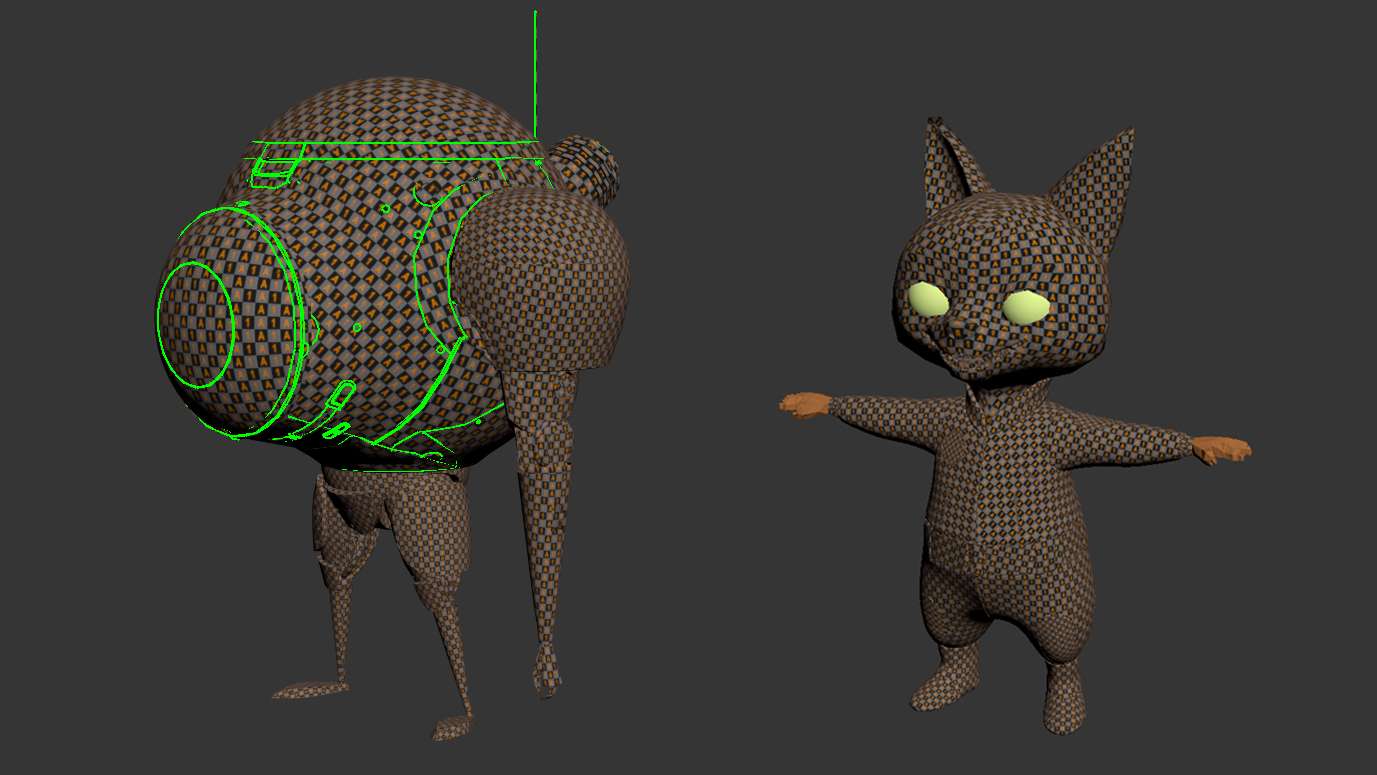
Now that both characters were unwrapped and textured, the next step became to rig them for posing. The robot rig was straight forward in which I used a combination of linking and dummy objects to transform the robots joints.The Fox character was built with a full skeletal rig and control objects for all joints of his body.

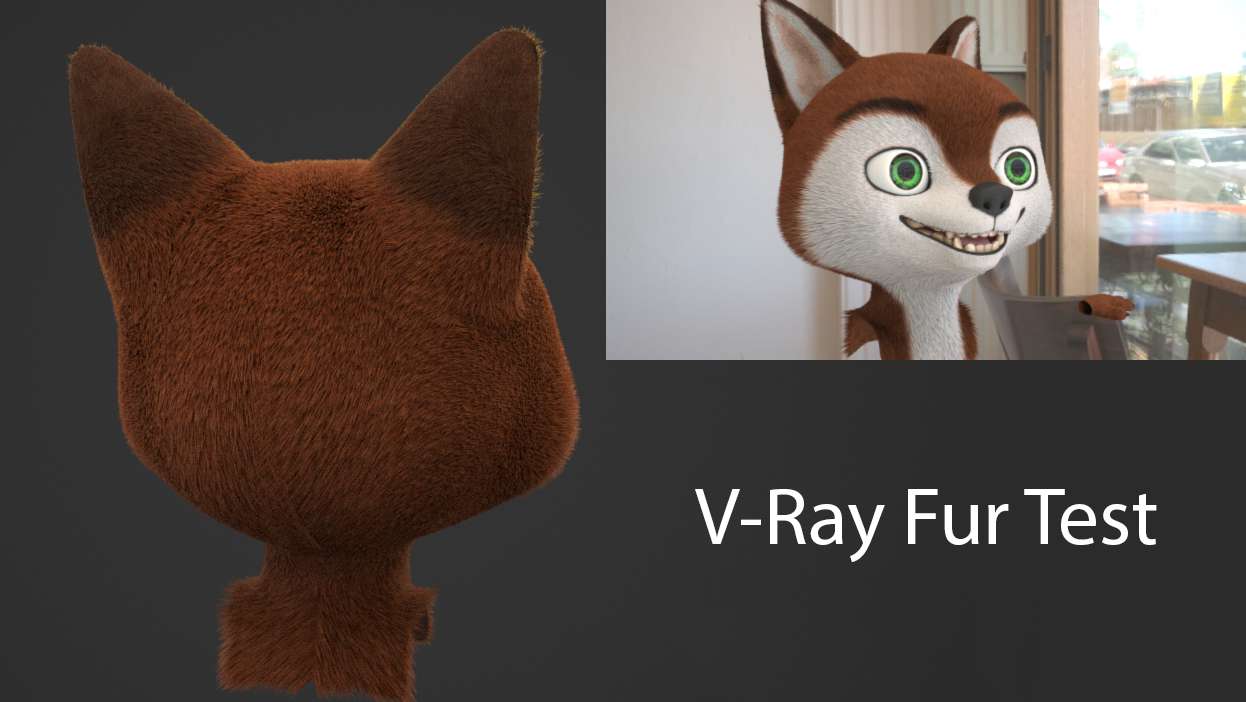
By the far the biggest challenge in this project was fur. Up to this point, I had never dealt with fur and had little to no knowledge on how fur bent, shortened, thickened around certain areas.This was certainly a challenge and many trials were taken before it finally made sense. The biggest challenge was understanding V-Ray Fur and how a vertex map, length map, and density map affected the fur. All in all it became a trial an error situation until finally a good mix of all three maps made the best fur simulation.

Trial and error became the name of the game when testing out the V-Ray fur modifier. In the end, about three V-Ray fur modifiers were added on top of each other for more randomness. Another issue I checked was to make sure that the fur was consistent naturally and did not have any hard stops that indicated seams from the UV.
Overall, this was a great experience dealing with fur and a creating animated style characters. I want to Thank Mike Yamada for the opportunity to create one of his concepts to model. Again, this was the first time that I had dealt with fur and it was quite an experience. Many lessons were learned and I hope to continue improving in all aspects of modeling.